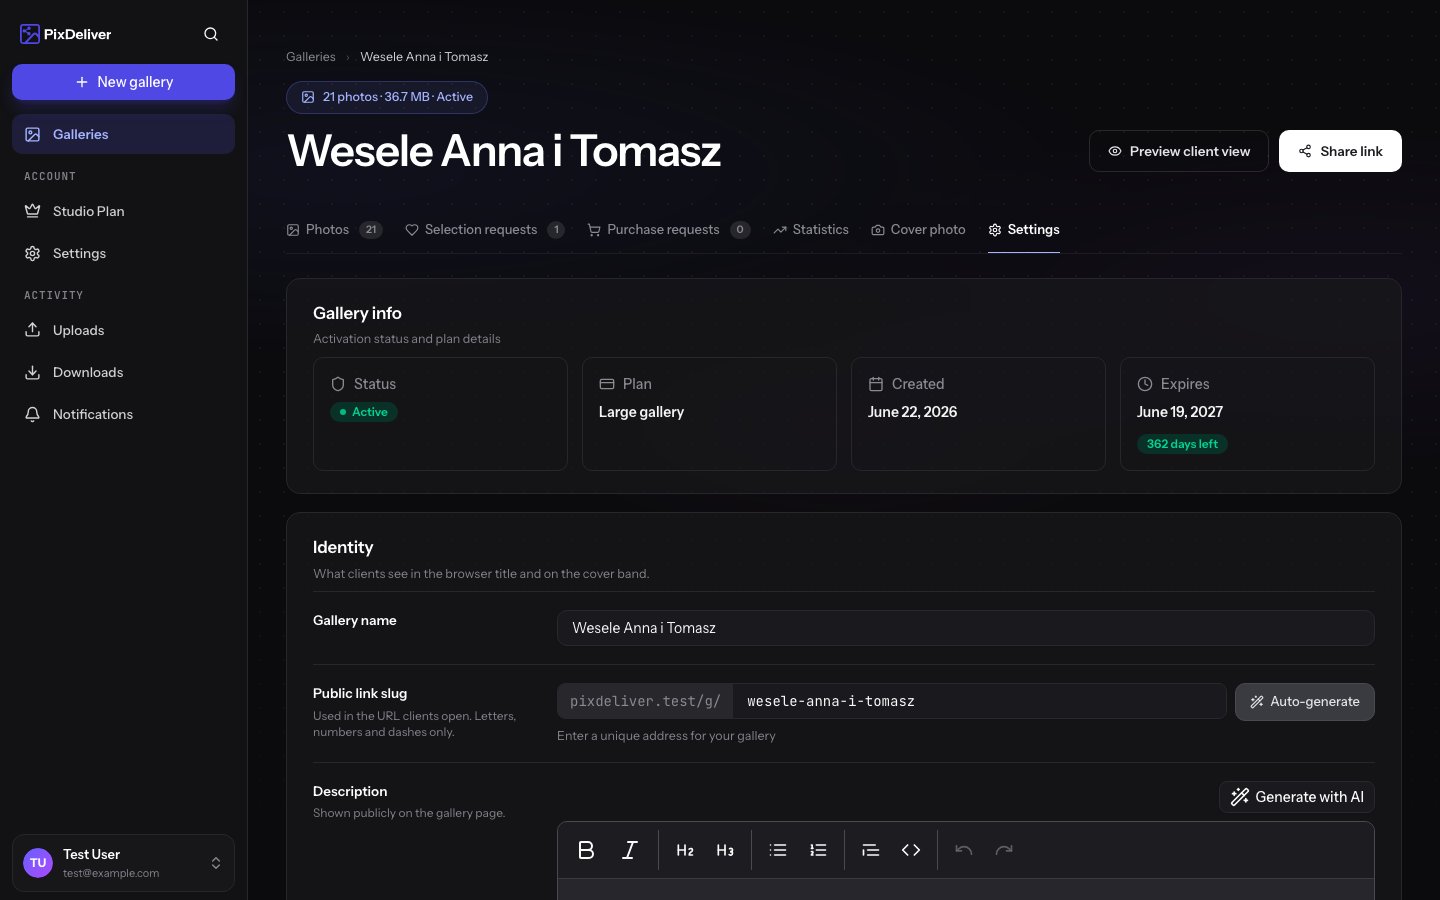
Overview
After creating a gallery, you can edit its settings at any time: change the name, slug (URL), description, password, and other parameters. All changes are immediate and visible to clients as soon as you save.Accessing gallery settings
Instructions:- Log in to PixDeliver
- Go to Galleries
- Find the gallery in the list and open it
- Open the Settings tab
- The gallery settings panel will open
Editing basic information
Changing the gallery name
Instructions:- In the Basic section, find the Gallery name field
- Enter a new name (up to 100 characters)
- Click Save changes
The gallery name is visible to clients. It should be descriptive and professional.
Changing the slug (URL)
Instructions:- In the Basic section, find the Slug field
- Enter a new slug (for example, “wesele-kasia-i-mariusz-2024”)
- Only lowercase letters, digits, and hyphens
- At least 3 characters
- Must be unique within your account
- The system checks availability in real time
- Click Save changes
Editing the description
Instructions:- In the Basic section, find the Description field
- Enter or update the gallery description
- You can use formatted text and emoji
- Click Save changes
Managing the password
Adding a password to a gallery
If the gallery was created without a password, you can add one at any time. Instructions:- Open the gallery you want
- In the Settings tab, enter a password
- Save your changes
Changing the password
Instructions:- In the Security section, find the current password (it’s visible)
- Enter a new password in the Password field
- Confirm the new password
- Save your changes
Removing the password
If you want to make the gallery publicly accessible without a password: Instructions:- In the Settings section, clear the Password protection field
- Save your changes
Delivery and sales
In the Delivery and sales section, you decide whether the gallery is free or paid:- Free — clients download the originals right away
- Paid — purchase of the entire gallery — clients buy the whole gallery
- Paid — purchase of individual photos — clients buy the photos they choose
Complete guides: Selling galleries and Purchase requests and settlement.
Gallery URL
Each gallery has two possible URLs - but you can only use one type per account:1. Default base address (root domain)
https://pixdeliver.com/g/wesele-jan-i-ania
2. Subdomain address (if set)
https://jan-kowalski.pixdeliver.com/wesele-jan-i-ania
Copying the link
You can do this in a few ways:- In the gallery settings, find the Public address section and copy it
- Click the Copy public link button on any subpage of the gallery
Status and expiration
Possible gallery statuses
- Unpaid - The gallery is not active and not publicly available
- Active - The gallery is paid for and available to clients
- Expired - The gallery has reached the end of its validity (after 1 year)
Expiration date
For active galleries, you’ll see the expiration date on the gallery list page: Example:The system sends automatic notifications:
- 30 days before expiration - from this point you can renew the gallery for a year
- 14 days before expiration - a reminder
- 7 days before expiration - a reminder
Renewing a gallery
Instructions:- Open the gallery you want - you’ll see an expiration notice
- The plan stays the same as the one used when the gallery was created
- Go to payment
- Once paid, the gallery will be active for another year
Deleting a gallery
Before deleting a gallery, make sure you have backups of all the photos!
Permanently deleting a gallery
If you no longer need a gallery: Instructions:- Scroll to the bottom of the gallery settings
- Find the Danger zone section
- Click the Delete gallery button
- Read the warning
- Enter the gallery name to confirm
- Click Permanently delete gallery
Exporting data
Downloading all photos
Before deleting a gallery, or for archiving, you can download all the photos: Instructions:- Open the gallery you want
- Click the Download button in the gallery menu
Tips and best practices
✅ Recommended:- Set a descriptive gallery name
- Add a description with instructions for clients
- Use a subdomain for a professional image
- Don’t change the slug after sharing the gallery
- Regularly check your galleries’ expiration dates
- Download a backup before deleting a gallery
- Set a password for sensitive sessions
- Renew galleries in advance (don’t wait until the last day)
- Changing the slug after sending the link to clients
- Deleting a gallery without downloading a backup
- Using the same password for every gallery
- Leaving a gallery unnamed or named “Test”
Troubleshooting
Problem: I can’t change the slug - it’s taken. Solution:- The slug must be unique within your account
- Check whether you already have a gallery with the same slug
- Add numbers, a date, or an extra description (for example,
-2024,-wesele)
- Send them the new link with the updated slug
- The old link no longer works and there’s no redirect
- In the future, don’t change the slug after sharing the gallery
- Check whether the password is entered correctly (it’s case sensitive)
- Make sure the password doesn’t have a space at the beginning or end
- View the current password in the gallery settings
- Send the password to clients again (copy it directly from the settings)
- Renew the gallery before 14 days pass after expiration
- After 14 days, the gallery may be deleted automatically
- Renewing it will restore the gallery’s availability for another year
- Scroll to the end of the form - the button is at the bottom
- Refresh the page (Ctrl+F5)
- Check whether you’ve filled in all the required fields
Related topics
- Creating a gallery - How to create a new gallery
- Selling galleries - Paid modes, watermark, and pricing
- Renewing a gallery - How to extend a gallery’s validity
- Sharing galleries - How to send the link to clients
- Statistics and analytics - Full statistics and analytics